I grew up eating frozen chicken pot pies. The only thing I liked about it was the crust! I like everything about this homemade pot pie. The recipe calls for store bought pie crust, which you can choose to use, but I like to make everything from scratch (especially after I read the unnecessary ingredients found in a store bought crust). Making the crust yourself will take more time, but it is well worth it. So before you can make this chicken pot pie, you need to make the crust.
This recipe is from my mother-in-law. She has given me several one-on-one tutorials on "the art of pie crust," but I still would not consider myself an expert. Every baker has his or her own pie crust recipe and technique. One crust may be more tender and flaky, more buttery, or more sweet. So try several recipes and see which one you like better. I like this recipe because it requires minimal ingredients, is fairly quick and easy, and seems to turn out good every time. Making pie crust can be tricky and takes practice so let's get to it.
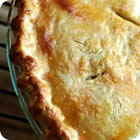 |
| Image courtesy of allrecipes.com |
Polly's Pie Crust
1 cup of all purpose (AP) flour1/8 teaspoon of salt
1/2 cup chilled shortening
1/4 cup ice cold water
Mix the flour and salt together. Cut shortening into the flour using a pastry cutter, knife, or fork. I've also read that you can use a food processor but I have never tried that method before. You want the flour and shortening to mix until it looks like small peas. Add the cold water and mix gently with a fork. Use your hands to gently press it into a ball.
 |
| I said generously... |
Generously dust flour onto a clean, dry surface. Flatten the dough ball out a little with your hands and dust the dough with flour. Using a rolling pin, start rolling the dough at the center and work your way outwards.
 Roll the dough into a circle 1/4 inch thick or so. As you roll, lift the edges to make sure they're not sticking. Add more flour if necessary. Otherwise the dough will be so stuck to the counter you have to start over and take the chance of having a tough crust. Just saying. Not that I have ever experienced that before or anything.
 After you have rolled the dough out you have to move it into your pie plate. This is when I hold my breath and move quickly. Some people fold the dough in half and then in quarters and move it to the pie plate placing the point in the center. You can then unfold it. Others sorta roll it onto the rolling pin and and then unroll into the pie plate. Do what works best for you. Just do it gently. When you get the crust in the pie plate, gently press the dough into the plate letting the excess dough hang off the edges. If you wanted to use this for a single-crust pie, you would go ahead and trim the edges leaving 1/2 inch of overhang, fold the edges under themselves, and flute the edges. Put for our pot pie leave the edges for now until you fill it and put the second crust on top. So yes, you need to do this process twice for the pot pie. I promise it will be well worth it.
 |
| Sigh of relief |
No comments:
Post a Comment